
Inventor Project
Inventor is a computer tool used for making 3D objects. On this computer tool you can make things for 3D printers to print. It can make 2D sketches in to 3D objects with one click. Inventor is a great tool for creating many things that are useful. I made six widgets in Inventor. Then I printed one on the 3D printer. Here is my journey through making one of the widgets.
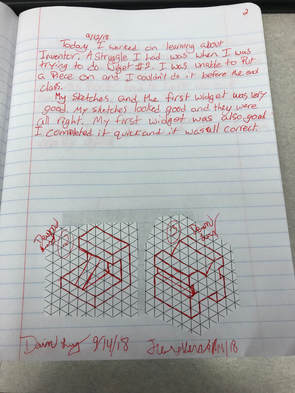
This is my designer notebook.
These are my original drawings of two
of the widgets. The M is the one on the right side
at the bottom of the page.
At the top I wrote what I did that day,
a struggle I had and a "win"
(good thing that happened) I had.
These are my original drawings of two
of the widgets. The M is the one on the right side
at the bottom of the page.
At the top I wrote what I did that day,
a struggle I had and a "win"
(good thing that happened) I had.
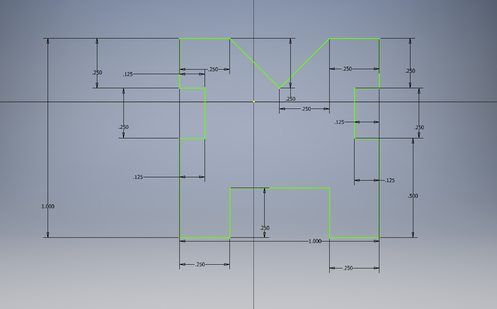 This is the sketch I made on Inventor. It is the outline of Widget #3 and it looks like an M
This is the sketch I made on Inventor.
It is the outline of Widget #3 and it looks like an M.
All of the lines with numbers are the dimensions of the pieces.
To make this I had to draw the M with the line tool. Then i had to dimension all of the sides to make them the correct length. Now I had to extrude it. I extruded the widget by pressing the extrude button at the top of the screen. I had to choose how thick I wanted it to be.
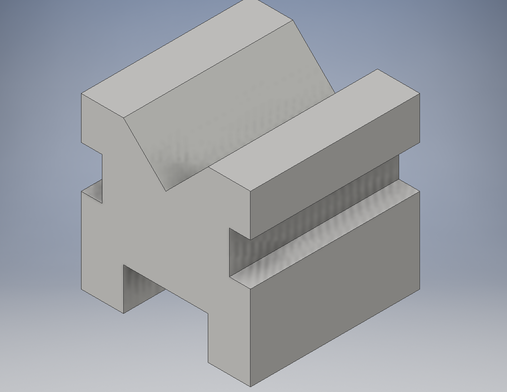
This is my finished widget on Inventor after I extruded it. This is how it will look like when I take it out of the printer. My widget will be gray because I chose that on the 3D Printer.
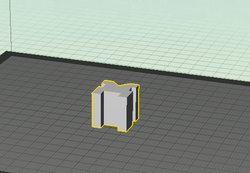
This is my widget in Makerbot
this is how the 3d printer
knows what to do.
this is how the 3d printer
knows what to do.
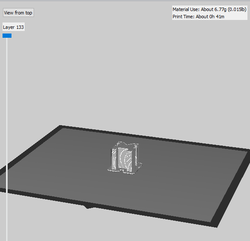
This is my widget
in Makerbot. It is the print preview.
This show what my widget
will look like while I print.
in Makerbot. It is the print preview.
This show what my widget
will look like while I print.
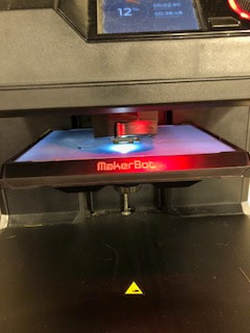 This is the start of the widget printing it is creating the base of the object.
This is the start of
the widget printing it is
creating the base of the object.
the widget printing it is
creating the base of the object.

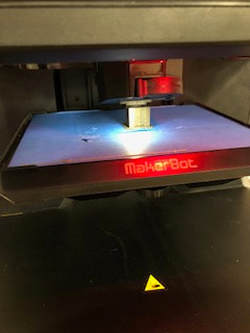
This is my widget in
the middle of printing.
It has printed half of the widget.
the middle of printing.
It has printed half of the widget.
This is the end of my widget printing.
It had 2 minutes left. The top was the last part
to be printed.
It had 2 minutes left. The top was the last part
to be printed.
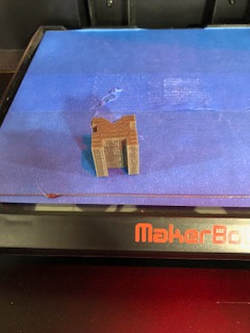
This is my final product it just came out
of the 3d printer. It has all the correct
dimensions.
of the 3d printer. It has all the correct
dimensions.


Summary
In the introduction I learned how to use inventor to create 3D objects. I learned how to create sketches with the correct dimensions. Then I learned how to extrude the sketch and make it a 3D object. I also learned how to put my sketch into the form that can 3D print. Then I learned how to put my document onto my flash drive and put it onto the 3D printer to print.
